
【EasyGPU】Lesson 3:EasyGPU 上的控制流与 Uniform 变量

第三节:EasyGPU 上的控制流与 Uniform 变量
在本章节中,我们将介绍 GPU 上的控制流以及 EasyGPU 的 Uniform 变量 API。我们依然会通过一个简单的例子来向你来介绍。
本节示例代码
#include <GPU.h>
#include <graphics.h>
#pragma comment(lib, "opengl32.lib")
int main() {
initgraph(640, 480);
BeginBatchDraw();
constexpr int size = 30;
try {
Texture2D<PixelFormat::RGBA8> texture(getwidth(), getheight(), GetImageBuffer());
Uniform<int> time;
Kernel2D kernel("render_window", [&](Int &X, Int &Y) {
Int t = time.Load();
auto r = ToFloat(X) / getwidth();
auto g = ToFloat(Y) / getwidth();
auto b = (r + g) / 2;
auto width = getwidth() / 2 + ToInt((getwidth() / 2) * Abs(Sin(ToFloat(t) / 1000)));
auto height = getheight() / 2 + ToInt((getheight() / 2) * Abs(Sin(ToFloat(t) / 1000)));
If(X >= width || Y >= height, [&] {
Return();
});
auto tex = texture.Bind();
Bool isWhite = ToBool((ToInt(ToFloat(X) / size) + ToInt(ToFloat(Y) / size)) & 1);
If(isWhite, [&]() {
tex.Write(X, Y, MakeFloat4(r, g, b, 1.0) * MakeFloat4(1, 1, 1, 1));
}).Else([&]() {
tex.Write(X, Y, MakeFloat4(0, 0, 0, 1));
});
});
while (true) {
cleardevice();
time = clock();
texture.Upload(GetImageBuffer());
kernel.Dispatch((getwidth() + 15) / 16, (getheight() + 15) / 16, true);
texture.Download(GetImageBuffer());
FlushBatchDraw();
}
}
catch (ShaderCompileException& e) {
MessageBoxA(nullptr, e.what(), "Shader Compile Error", MB_ICONERROR);
std::cout << e.GetBeautifulOutput();
}
return 0;
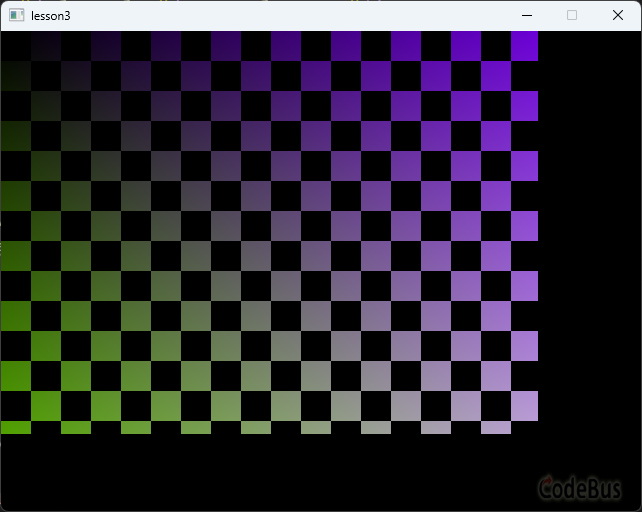
}运行代码,我们可以看到一个随时间大小变化的渐变色棋盘:
如果你做了 Lesson2 的作业,应该记得第二题要求输入固定大小的图像。为什么非得固定?这是个问题。
我们的 Kernel 以 16×16 的线程块为单位执行,WorkGroup 数量计算公式是 (width / 16, height / 16)。假如图像尺寸不是 16 的倍数,整数除法会自动截断——比如宽 100 像素的图像,100 / 16 = 6,只能覆盖 96 列,右边会缺一块。
那改成向上取整呢?(width + 15) / 16。这样确实能覆盖完整图像,但会多出一批越界的线程。比如宽 100 像素的图像,(100 + 15) / 16 = 7,第 7 个线程块会访问 X=96~111 的区域,其中 100~111 是非法的。
所以我们必须在 Kernel 内部判断 X、Y 是否越界。但这里有个问题:EasyGPU 的 Kernel 最终翻译成 GPU 着色器,我们不能直接写 C++ 的 if/else,而得用 EasyGPU 提供的控制流 API——If、For、While、Do-While、Return。于是,这便引出了我们本节的第一个话题——EasyGPU 中的控制流语句。
EasyGPU 中的控制流
在 EasyGPU 中,你可以使用 If、For、While、Do-While、Return 等一系列 EasyGPU 提供的函数来表示在 Kernel 中控制流。不同于 C++ 的 if/else 等控制流语句——它们不会被记入 IR (中间表示)并被翻译成 GPU 着色器语言—— EasyGPU的这套 API 允许你创建 GPU 中的逻辑控制流。下面分别介绍不同控制流的语法。
If 控制流
正如你所熟知 if/else if/else 那样,If 控制流通过链式调用完成控制链的构造,具体语法如下:
If(Cond, [&]() {
    ...
}).Elif(Cond1, [&]() {
    ...
}).Elif(Cond2, [&]() {
    ...
})
...
.Else([&]() {
    ...
});
在 EasyGPU 中的 Kernel 中,应用 Elif 替代 else if。Else、Elif 均为可选添加,不做强制要求。如示例代码中:
If(isWhite, [&]() {
    tex.Write(X, Y, MakeFloat4(r, g, b, 1.0) * MakeFloat4(1, 1, 1, 1));
}).Else([&]() {
    tex.Write(X, Y, MakeFloat4(0, 0, 0, 1));
});
For 控制流
For 控制流不同于 C++ 中的 for 控制流,其有两种语法:
For (start, end, [&](Int &Index) {
    ...
});
For (start, end, step, [&](Int &Index) {
...
});其中 lambda 函数中的形参 Index 表示本次循环的循环量(Index = start + step * n), start, end 必须是整数类型,可以通过 step 参数指定 For 的步进步长(若不指定,则默认为 1),如:
For (1, 10, 2, [&](Int &Index) {
    ...
});
将以 2 为步长进行步进。
While 控制流
While 控制流的语法如下:
While (cond, [&]() {
    ...
});
其中 cond 表示条件,只要 cond 为 true,则持续执行 lambda 函数内的逻辑。
Do-While 控制流
DoWhile([&]() {
    ...
}, Cond);
DoWhile 会首先尝试执行 lambda 函数体内的逻辑,再判断 Cond 是否为 true,若为 true 则继续执行 lambda 函数体内的逻辑,直到 Cond 为 false。
Return 控制流
Return 控制流有两种语法,一种是空 Return,一种是含值 Return:
Return(); // 空 ReturnReturn(Val); // 含值 Return在 Kernel 中不能使用含值 Return,含值 Return 供给 Callable 使用(其将会在后面的 Lesson 中介绍到,是 EasyGPU 中用于封装重复逻辑的解决方案)。
重要提示:在 GPU 程序中尽可能减少控制流是一个明智的选择,过多的控制流会导致程序性能大大下降。这是因为 GPU 中没有 CPU 一样的分支预测等专门用于处理复杂逻辑的能力!
Uniform 变量
在前面的 Lessons 中,我们已经学习了如何创建 Buffer<T> 来与 GPU 交换大规模的数据,如何通过 Texture2D<PixelFormat> 来与 EasyX 中的图像缓存进行 CPU-GPU 交互。这些数据传输手段看起来已经足够了,然而,设想这么一个情况:如果我只想修改 GPU 中的一个变量呢?难道我要反复上传一个 Buffer<T> 吗?答案是否定的。这便是 Uniform 变量的用武之地。请看示例代码中出现了这么一行:
Uniform<int> time;这行代码定义了一个 Uniform 变量 time,它在每一次渲染循环中都会被赋值为 clock() 再传入 Kernel。于是 Kernel 内就可以根据时间动态调整棋盘大小。Uniform 变量是一系列只读变量,GPU 不可以修改 Uniform 变量,只可以读取。其适用于单变量只读操作,相比 Buffer<T> 和 Texture2D<PixelFormat> 方法在特定的条件下会获得更佳的性能。
类似地,如果你要在你的 Kernel 中引用一个 Uniform 变量,你需要在你的 Kernel 中使用 Load 函数来将你的 Uniform 变量加载到 Kernel 中,如示例中的:
Int t = time.Load();一旦 Uniform 加载到了 Kernel,那么每次 Kernel 被调度时,Kernel 内对应的变量就会变成提交前对应的 C++ 端的变量的值。如:
Uniform<int> a = 0;
Kernel1D kernel([&]() {
    auto var = a.Load();
});

a = 1;
kernel.Dispatch(1, true); // Now var = 1
课后作业
作业题目
- 试阐述以下问题:
-
-
- 为什么在 EasyGPU 中不能直接使用 C++ 的 if/else,而必须使用 If/Else 等控制流 API?
- Uniform<T> 的作用是什么?如何在 Kernel 中读取 Uniform 变量的值?
- 当图像尺寸不是 16 的倍数时,如何处理越界的线程?
-
2. 使用 Uniform<int>、Texture2D 和 Kernel2D 实现一个动态的波纹效果。
要求:
- 加载一张图片(或使用纯色背景)
- 使用 Uniform<int> 传入当前时间(毫秒)
- 在 Kernel 中根据时间计算波纹效果:对于每个像素 (X, Y),计算它到图像中心 (cx, cy) 的距离 d,然后根据 d 和时间 t 计算偏移量,产生类似水波的扭曲效果
- 公式提示:可以使用 Sin(d / wavelength - t / speed) 来计算波纹强度
- 使用 If 判断来处理越界情况(图像尺寸可能不是 16 的倍数)
- 在 CPU 端每帧更新时间并重新 Dispatch,实现动画效果
提示: 你需要在 Kernel 中使用 texture.Read() 读取原始像素,计算偏移后的采样坐标,然后将结果 Write 回去。
3. (可选)尝试使用 For 循环在 Kernel 中实现一个简单的高斯模糊效果(3×3 或 5×5 的卷积核)。
答案
1. 略
2.
#include <GPU.h>
#include <graphics.h>
#include <iostream>

#pragma comment(lib, "opengl32.lib")

int main() {
    initgraph(640, 480);

    IMAGE img(640, 480);
    loadimage(&img, TEXT("./test.jpg"));

    int width = img.getwidth();
    int height = img.getheight();
    int cx = width / 2;
    int cy = height / 2;

    Texture2D<PixelFormat::RGBA8> inputTex(width, height, GetImageBuffer(&img));
    Texture2D<PixelFormat::RGBA8> outputTex(width, height);

    Uniform<int> time;

    try {
        // 创建波纹效果 Kernel
        Kernel2D rippleKernel("Ripple Effect", [&](Int& X, Int& Y) {
            auto inTex = inputTex.Bind();
            auto outTex = outputTex.Bind();

            // 越界检查
            If(X >= width || Y >= height, [] {
                Return();
            });

            // 读取时间
            Int t = time.Load();

            // 计算到中心的距离
            Float dx = ToFloat(X) - MakeFloat(cx);
            Float dy = ToFloat(Y) - MakeFloat(cy);
            Float dist = Sqrt(dx * dx + dy * dy);

            // 波纹参数
            Float wavelength = MakeFloat(50.0f);  // 波长
            Float speed = MakeFloat(200.0f);      // 传播速度
            Float amplitude = MakeFloat(10.0f);   // 振幅

            // 计算波纹偏移
            Float phase = dist / wavelength - ToFloat(t) / speed;
            Float offset = amplitude * Sin(phase);

            // 根据距离衰减波纹强度
            Float maxDist = MakeFloat(300.0f);
            Float decay = MakeFloat(1.0f) - Min(dist / maxDist, MakeFloat(1.0f));
            offset = offset * decay;

            // 计算采样坐标
            Float sampleX = ToFloat(X) + dx / dist * offset;
            Float sampleY = ToFloat(Y) + dy / dist * offset;

            // 边界保护
            sampleX = Max(MakeFloat(0.0f), Min(sampleX, MakeFloat(width - 1)));
            sampleY = Max(MakeFloat(0.0f), Min(sampleY, MakeFloat(height - 1)));

            // 读取并写入
            Float4 color = inTex.Read(ToInt(sampleX), ToInt(sampleY));
            outTex.Write(X, Y, MakeFloat4(color.x(), color.y(), color.z(), color.w()));
        });

        inputTex.Upload(GetImageBuffer(&img));

        BeginBatchDraw();
        while (true) {
            cleardevice();

            // 更新时间
            time = clock();

            // 执行波纹效果(从 inputTex 读取原始图像,写入 outputTex)
            rippleKernel.Dispatch((width + 15) / 16, (height + 15) / 16, true);

            // 下载结果到 img 用于显示
            outputTex.Download(GetImageBuffer(&img));

            // 显示
            putimage(0, 0, &img);

            FlushBatchDraw();

            Sleep(10);
        }
        EndBatchDraw();
    }
    catch (ShaderCompileException& e) {
        MessageBoxA(nullptr, e.what(), "Shader Compile Error", MB_OK | MB_ICONERROR);
        std::cout << e.GetBeautifulOutput() << std::endl;
    }

    closegraph();
    return 0;
}
程序说明:
1. 双缓冲设计:使用两个纹理 inputTex 和 outputTex,避免在 Kernel 中读写同一个纹理造成冲突。inputTex 存储原始图像,只上传一次;outputTex 存储每帧的渲染结果
2. 避免效果叠加:注意 inputTex.Upload() 只在初始化时调用一次,不在渲染循环中调用。如果每帧都重新上传,会导致波纹效果被反复叠加,产生闪烁
3. 越界处理:使用 If 语句在 Kernel 开头检查 X 和 Y 是否超出图像范围
4. 波纹计算:
- 计算每个像素到中心的距离 dist
- 使用正弦函数 Sin(dist / wavelength - time / speed) 产生波动的相位
- 根据距离衰减波纹强度,使波纹在边缘逐渐消失
5. 边界保护:使用 Max/Min 确保采样坐标不会越界
效果示意:
程序运行后,你会看到图像中心产生向外扩散的水波效果,波纹随时间动态传播。
3. 略
添加评论
取消回复